Blogs
How to make Cloudflare as a proxy for AWS Route53
How to make Cloudflare as a proxy for AWS Route53
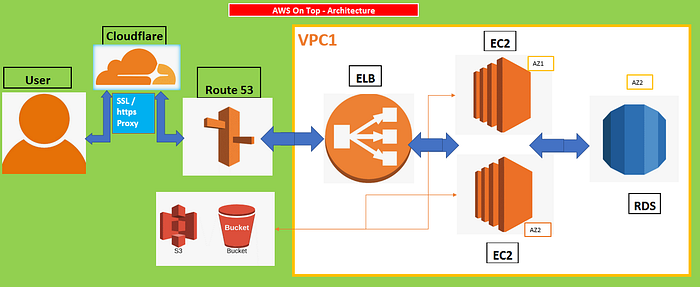
Cloudflare serving a proxy for Route53
What is Cloudflare : Cloudflare provides content delivery network services, DDoS mitigation, Internet security and distributed domain name server services.Cloudflare’s services sit between the visitor and the Cloudflare user’s hosting provider, acting as a reverse proxy for websites. They have different pricing models ranging from Free service with limited features to pay per service for all other available features.
Before registering on Cloudflare, we should have our own website, DNS registered let’s say with GoDaddy.com and AWS Route53 as a hosted zone.
1) Sign-up using your email id: https://dash.cloudflare.com/sign-up.
2) Add your your website host name.
3) Select a (free website) plan for your website and click continue.
4) Once the plan is selected, the next page will automatically retrieve the NS records from Route53 and provide an equivalent Cloudflare NS record.
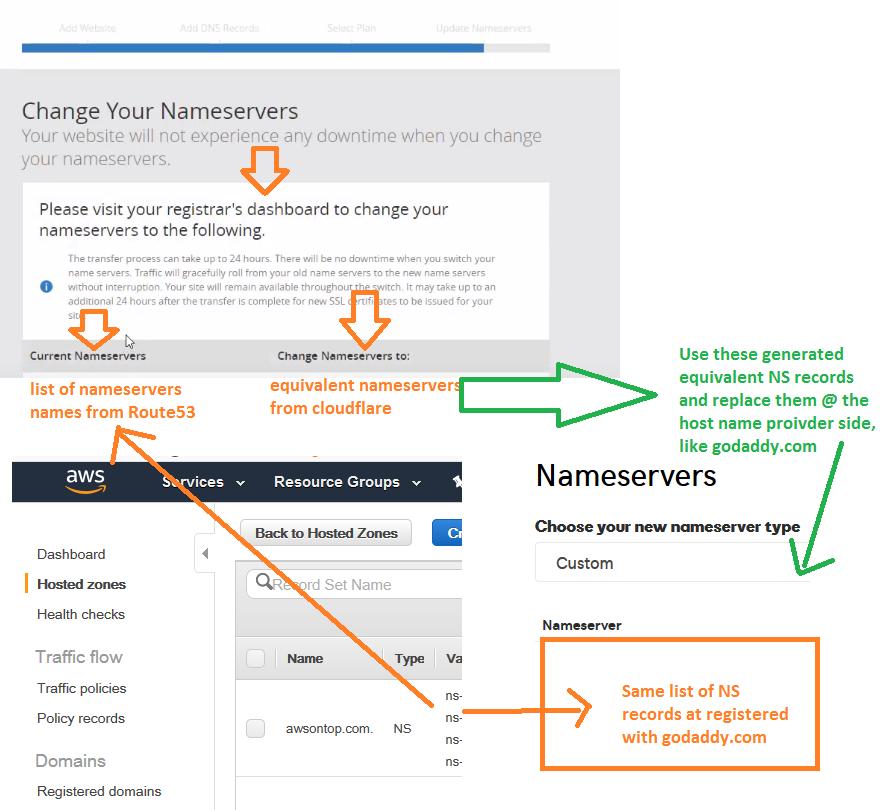
5) Copy the cloudflare equivalent NS records and click continue, which will take you to next page(status pending till the change is complete at DNS provider side or where you bought your host name).
6) Simultaneously go to your host name provider (godaddy) to edit the NS records . Manage DNS / change the custom DNS to the newly generated NS records as copied above. You can edit the existing records and replace with these or delete the existing NS records and add these Cloudflare equivalent NS records and save.
7) Once the NS records are update and saved in DNS provider side, it may take couple minutes for the cloudflare status to change to Active, even though description says ‘Allow upto 24 hours …‘ . Once status is changed, you will find your website name status as Active.
8) That’s all required, to make your site registered at cloudflare. Now on cloudflare will act as proxy between User & Route53 hosted zones and serve the visitor. You can refresh your website to start Cloudflare to serve the content.
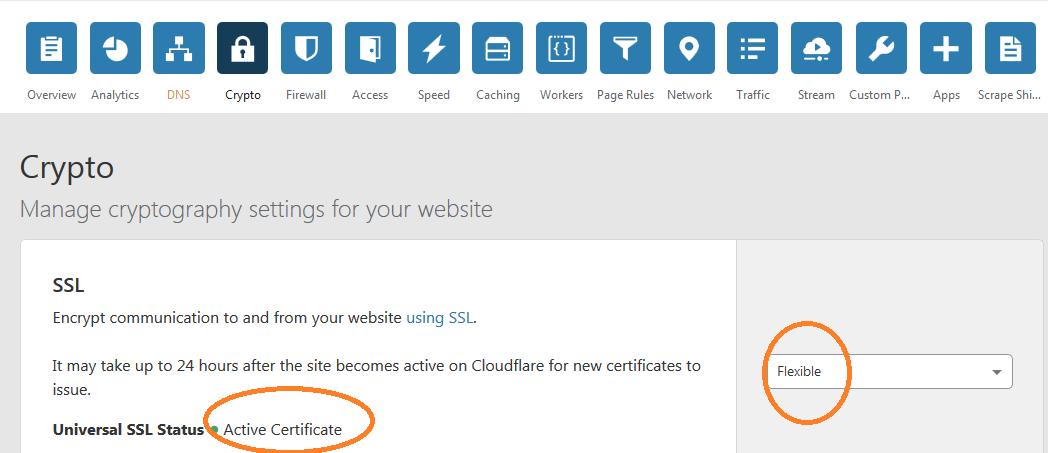
9) Now you can enable a free feature SSL encryption for your website, make sure SSL certificate is active before updating your site address to https to give your users a secure access.SSL activation may take some time or even hours. Wait till you see Crypto → SSL Certificate Active. You can change your site url to start with or redirect to https instead of http.